Table of Contents
A Guide to Landscape Photography in India
India is a beautiful country with various landscapes that will take anyone’s breath away. From ranges of mountain, stretches of beach, beautiful valleys, and stunning architecture, this country has a lot to offer.
Attempting to nail Indian landscape photography can be tricky if you don’t know where to start.
Photography is all about the right moment being frozen forever inside that tiny box, for good. But as it goes, there are very few moments you can actually capture at the right time, so you need to be prepared for the perfect shot.
Fortunately for you, we have a comprehensive India landscape photography guide for you, including a few techniques, tricks, and tips on how you can do that.
Let’s begin, shall we?
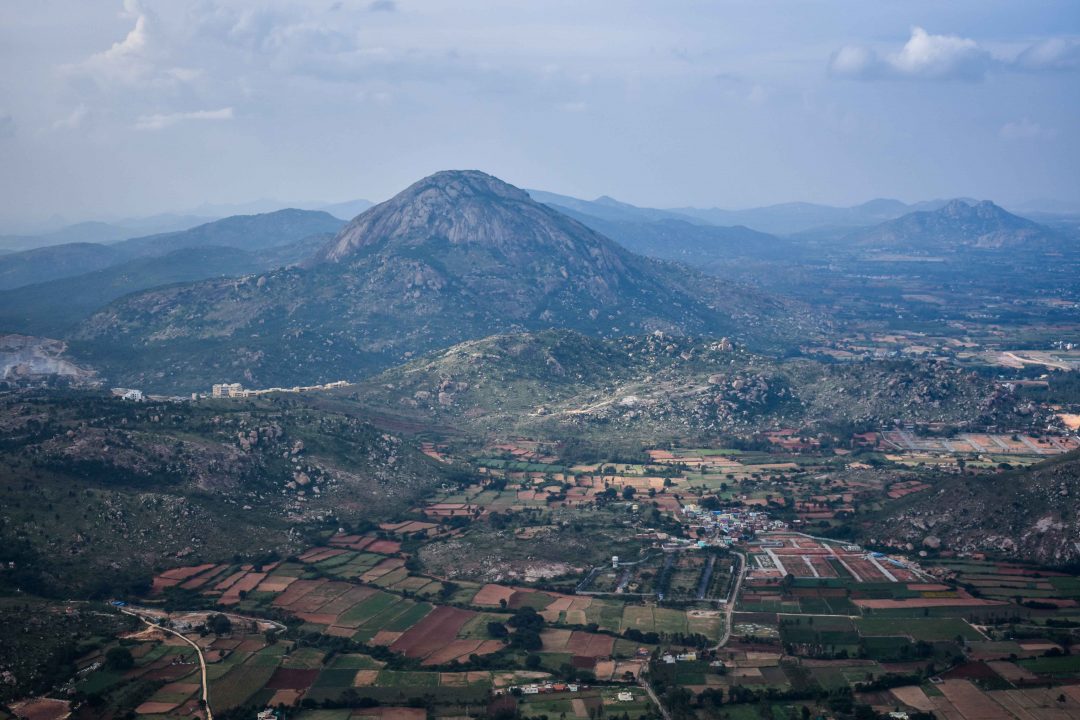
1. For the Mountaineer:
Get your tripod, camera, and lens for your next trekking expedition, because there is that perfect photo awaiting you. Professional photographers swear by their cameras that the beauty of capturing a mountain lies in the grandeur of the scenery that comes naturally in photos. Make sure you use a tripod to capture that.
Ideal settings on your camera: Choose an aperture with an f-stop value of f/11 to f/16 for a larger depth of field. Use the lowest ISO setting in your camera with a shutter speed of 1/30 of a second.
Perfect time to capture a shot: The golden hour. Wait for a sunrise or a sunset to spread the soft, natural lighting in your photos. In the picture below, Sunny Gala made the most of the golden hour, and the result is incredibly amazing.
Early morning photos may cause a blue fog haze to appear in your clicks which could cause a problem in clarity. Therefore, during post-processing, apply a yellow filter on the photos to get rid of the haze.
Lens: Wide-angle with a 35mm equivalent of 28mm or wider. This ensures you will capture a lot more in the photo without missing the important parts in the background.
What to avoid: Cloudy days. However, if you are met with an array of clouds on your trek, you can use a tripod and bump up the ISO. Don’t exceed 800 on the ISO.
What to focus: Focus on the foreground of the photos. Adjust your focus to highlight the peaks and crevices of the mountains to give it a rich, well-hued look.
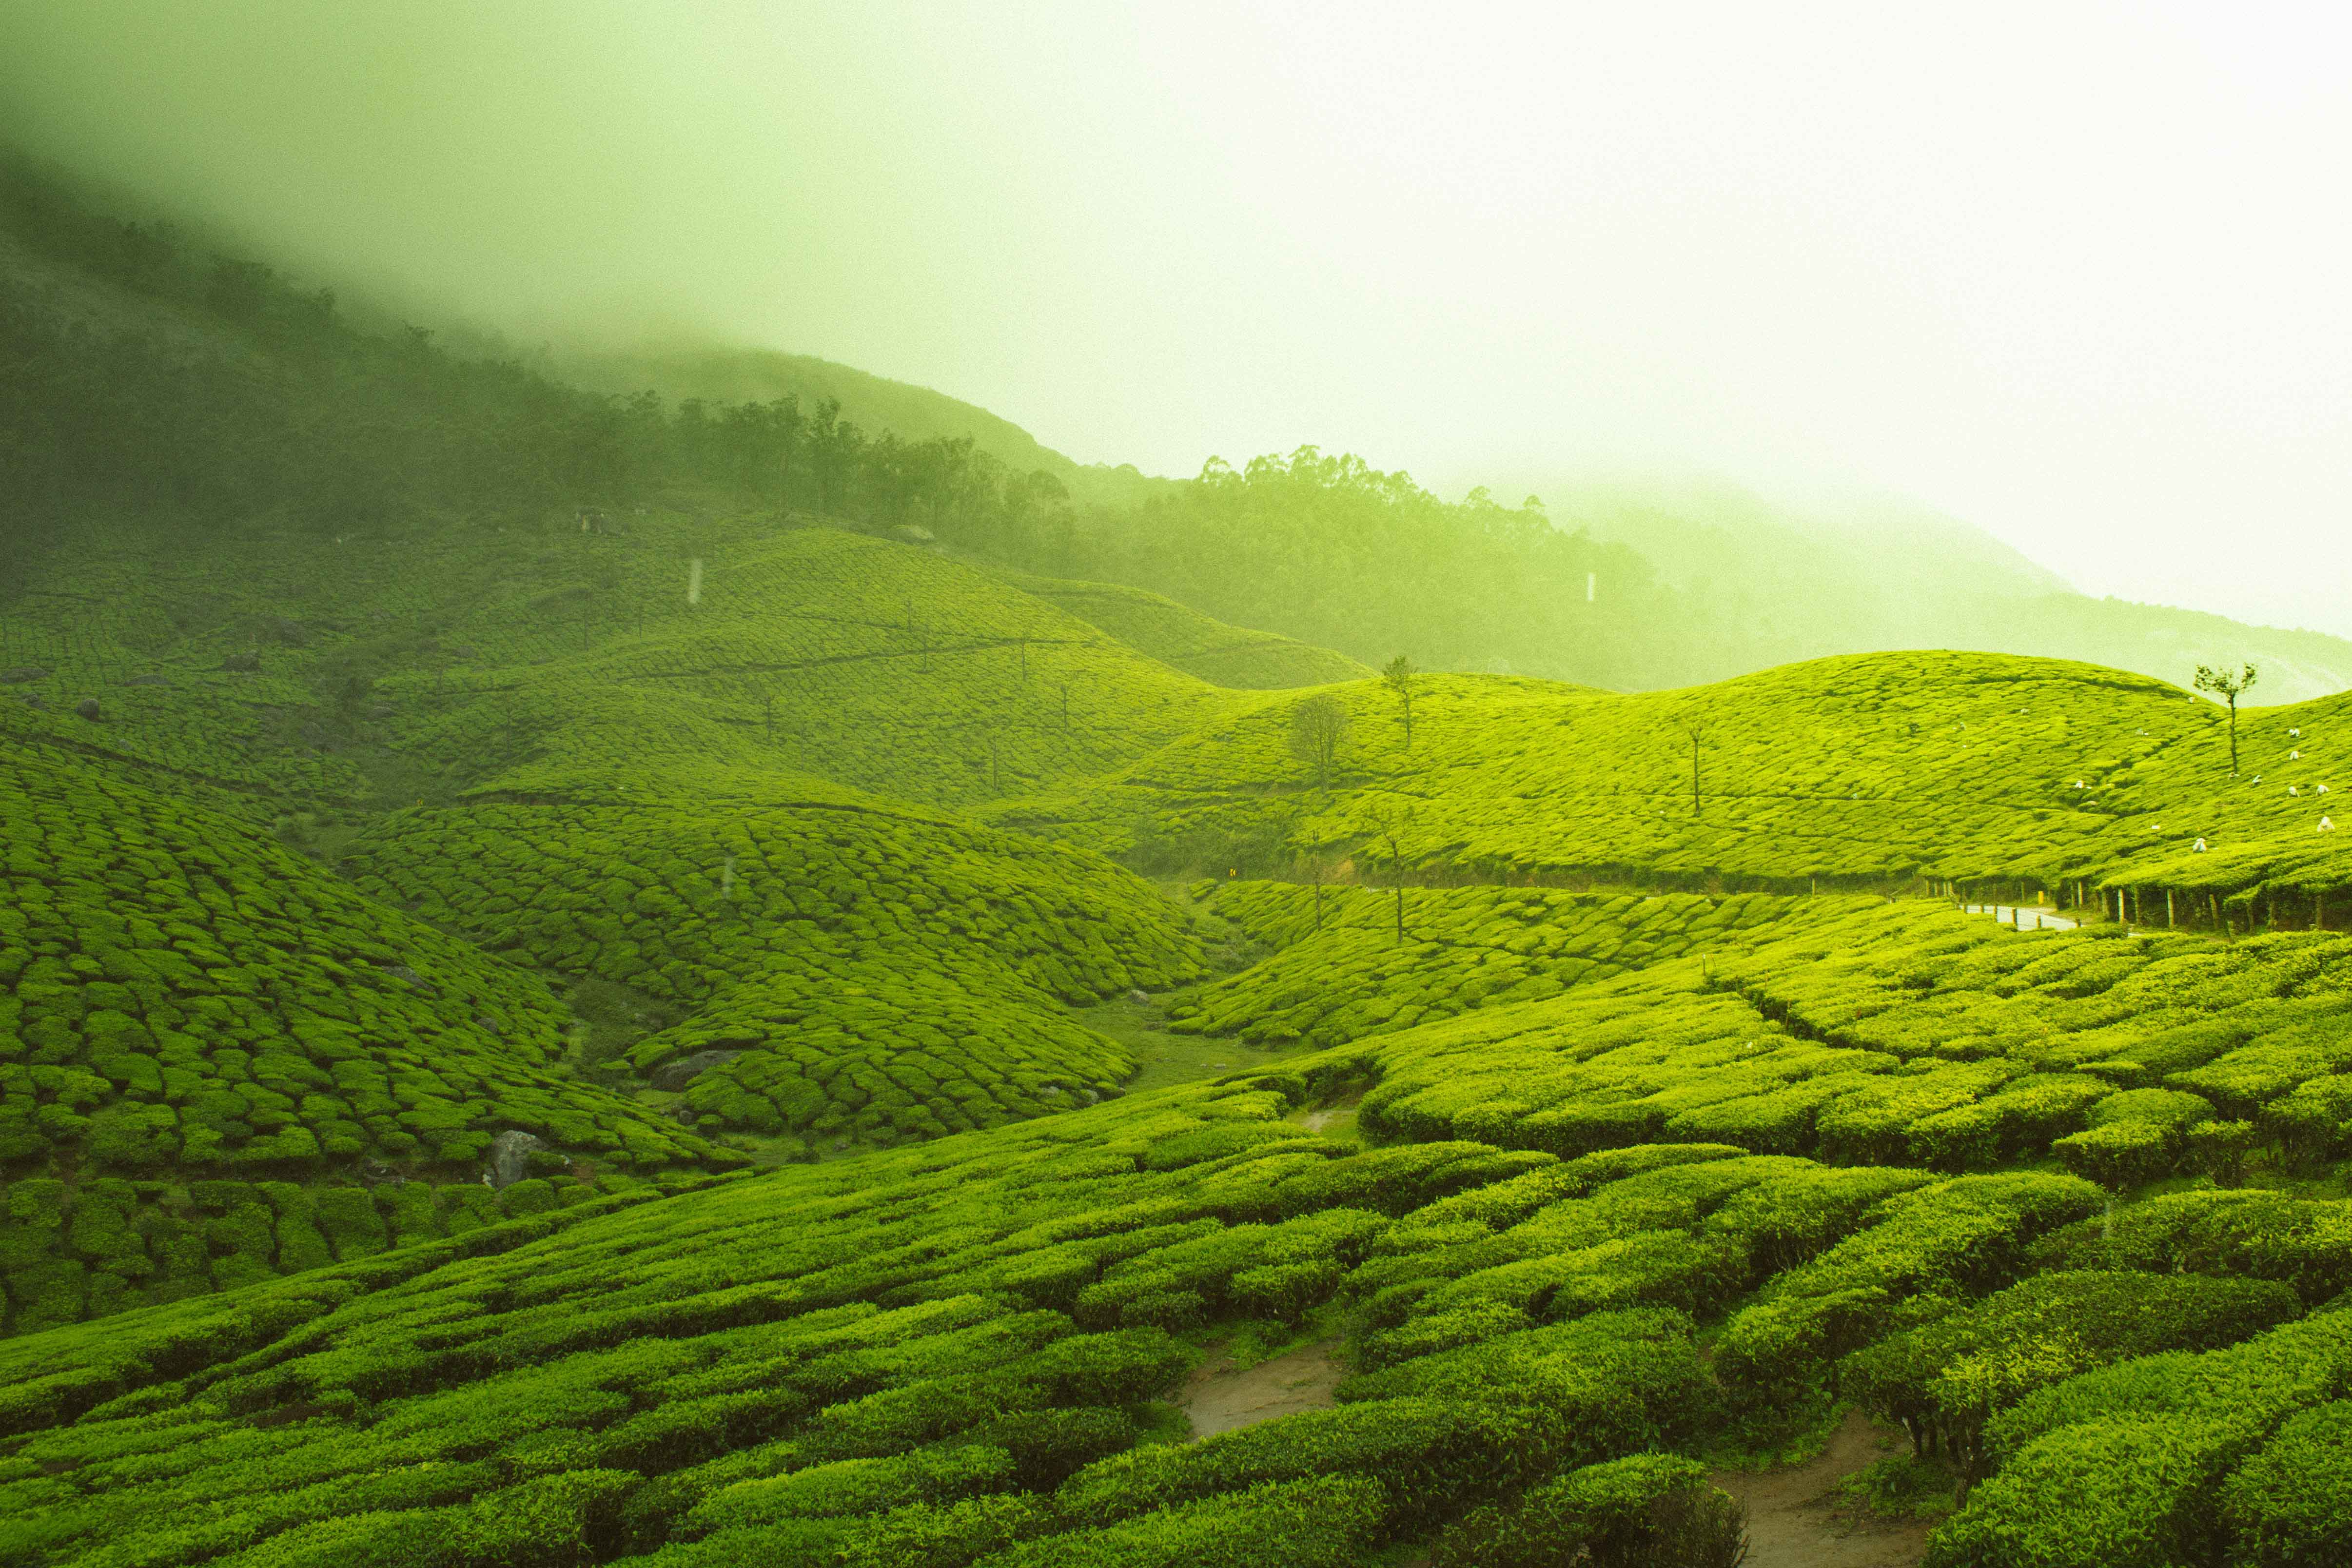
India beckons: Start with the green hills of Munnar and follow your way up to the Nubra Valley in Ladakh for the perfect, clear mountain photo.
READ: How to Do Pro-Quality Travel Photography with Your Smartphone Camera
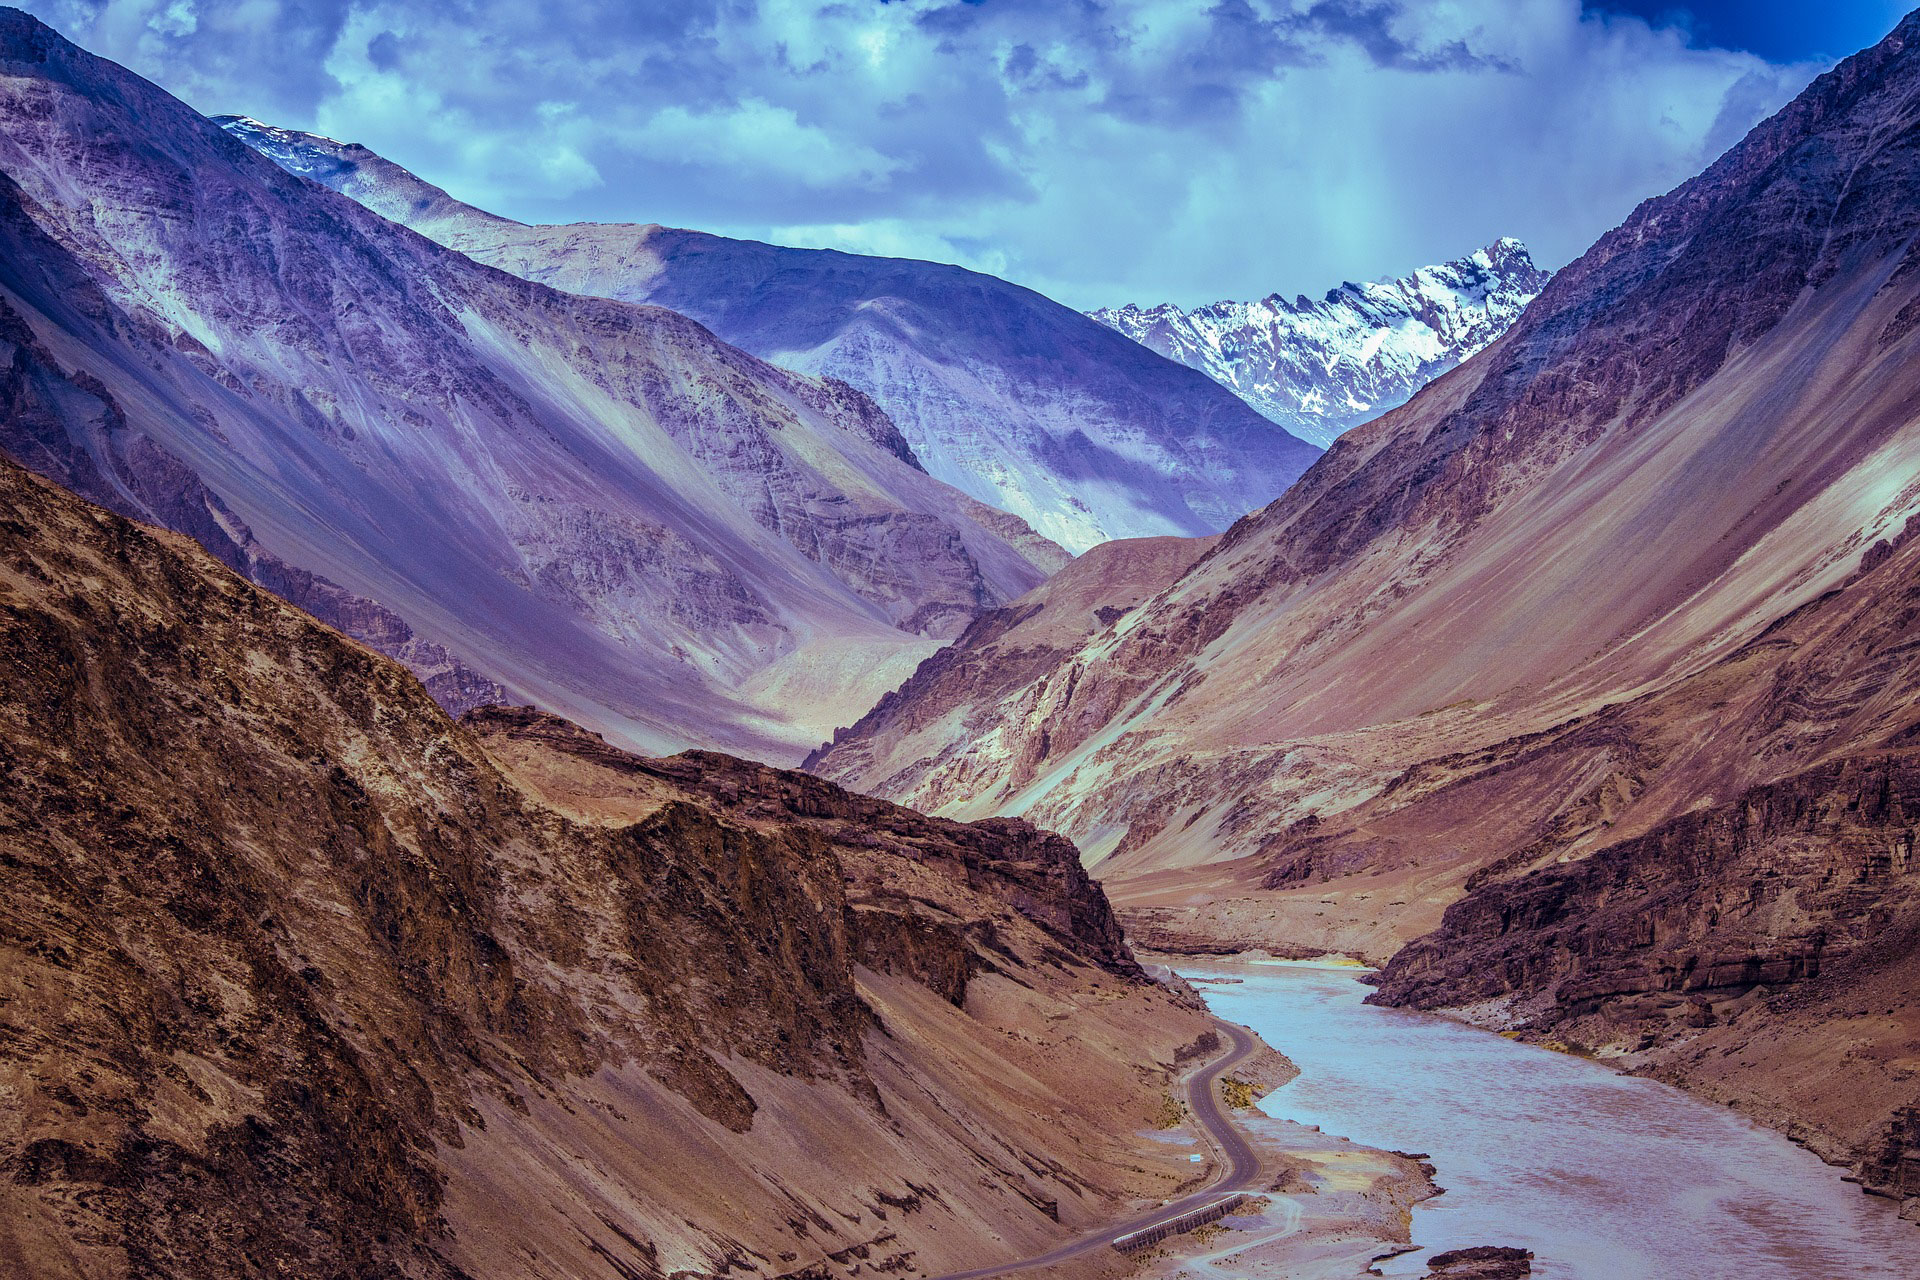
2. For the Valley Rover:
Eroded and dry lands do not make for an appealing landscape photography, but to the photographer’s eye, it is a playground for creativity. Valleys are flat, wide expanse structures of nature that revel in being open for miles on end. For the perfect valley photo, you need to focus simply on just one thing: do not make it look dull!
Ideal settings on your camera: The ideal aperture for a valley photo is f/16 or f/22. Carry a 70-200 lens and zoom in, so you will not have to worry too much about depth of field. Use a tripod and keep your ISO at 100.
Perfect time to capture a shot: Valley photos look best during the afternoon, and for the amateur photographer, it is a play of natural light that makes their photo look easier and catchier to look at, without the hassle of post-processing.
Lens: A Nikon or Canon 50mm and 18-55mm lenses for HD wide angle shots of the gaping landscape of the valley. Valleys are habitats for flora that are easily missed, so make sure you capture that.
What to avoid: Fog, and other elements of nature that may appear to give the photo an effective look, but in hindsight, only makes the photo look too crowded and takes away the attention from the valley’s beauty.
What to focus: Try low-angled shots from the ground to see how well they capture the depth of the valley. The arid landscape will make for a lovely photograph from that viewpoint. Sourabh Gandhi, for example, captured the majestic Spiti Valley with this low-angled shot.
India beckons: The breathtaking views of Kashmir Valley and Dibang Valley in Arunachal Pradesh are perfect for the amateur landscape photographer to test their India landscape photography skills.
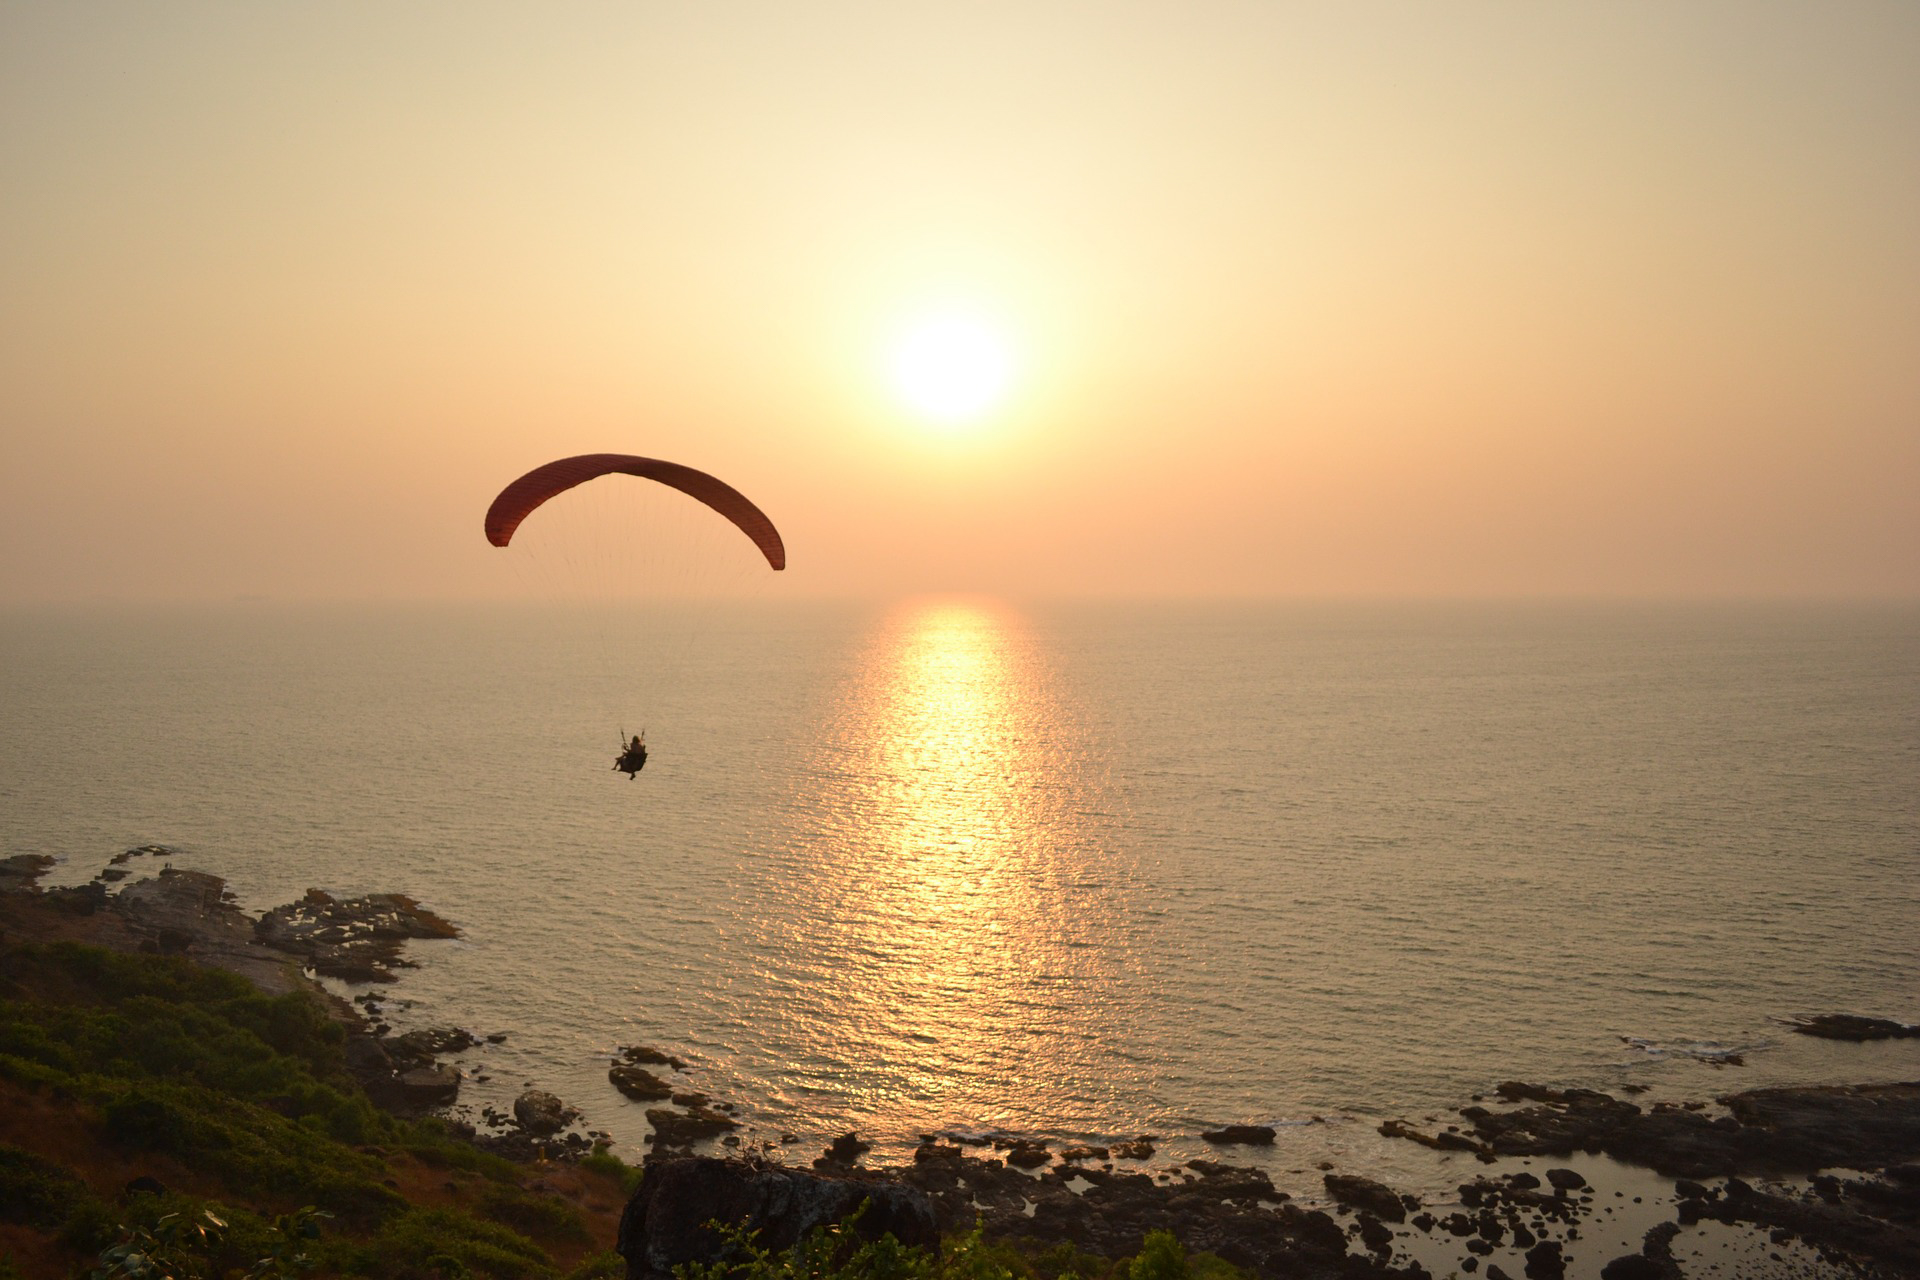
3. For the Beach Comber:
A beach is a place for solitude, romance, and family fun and adventure, all in one. Perhaps the best place for you to experiment with your camera for all kinds of shots, the beach is not just a place for the photographer to relax and unwind, but to find and capture the perfect snapshot as well.
Ideal settings on your camera: Operate on a low ISO setting (think of 100 or 200), with a narrow aperture (somewhere between f14 and f22) and a moderately fast shutter speed, depending on the time of the day you are taking your shot.
Perfect time to capture a shot: Again, wait for the golden hour. Early morning shoots or sunset shoots make for a perfect photograph.
Lens: A basic 15-85mm lens. For beach photography, your ideal photo should be one that focuses on a point of interest, with less exposure and depth of field. Therefore, a basic lens can do the trick.
What to avoid: Afternoon photography. The day is too bright and you will need to fiddle too much with your settings for the photo to look right.
What to focus: Waves. They always make for dramatic photos, provided your sole goal is to capture the waters of the beach.
India beckons: Beaches in Goa and Tuticorin make for lovely photos. The liveliness you can see on the beaches in Goa gives you ammo to recreate the perfect photo. Tuticorin waters are clear blue, like the sky, and this gives you colour that can really help amplify your photo.
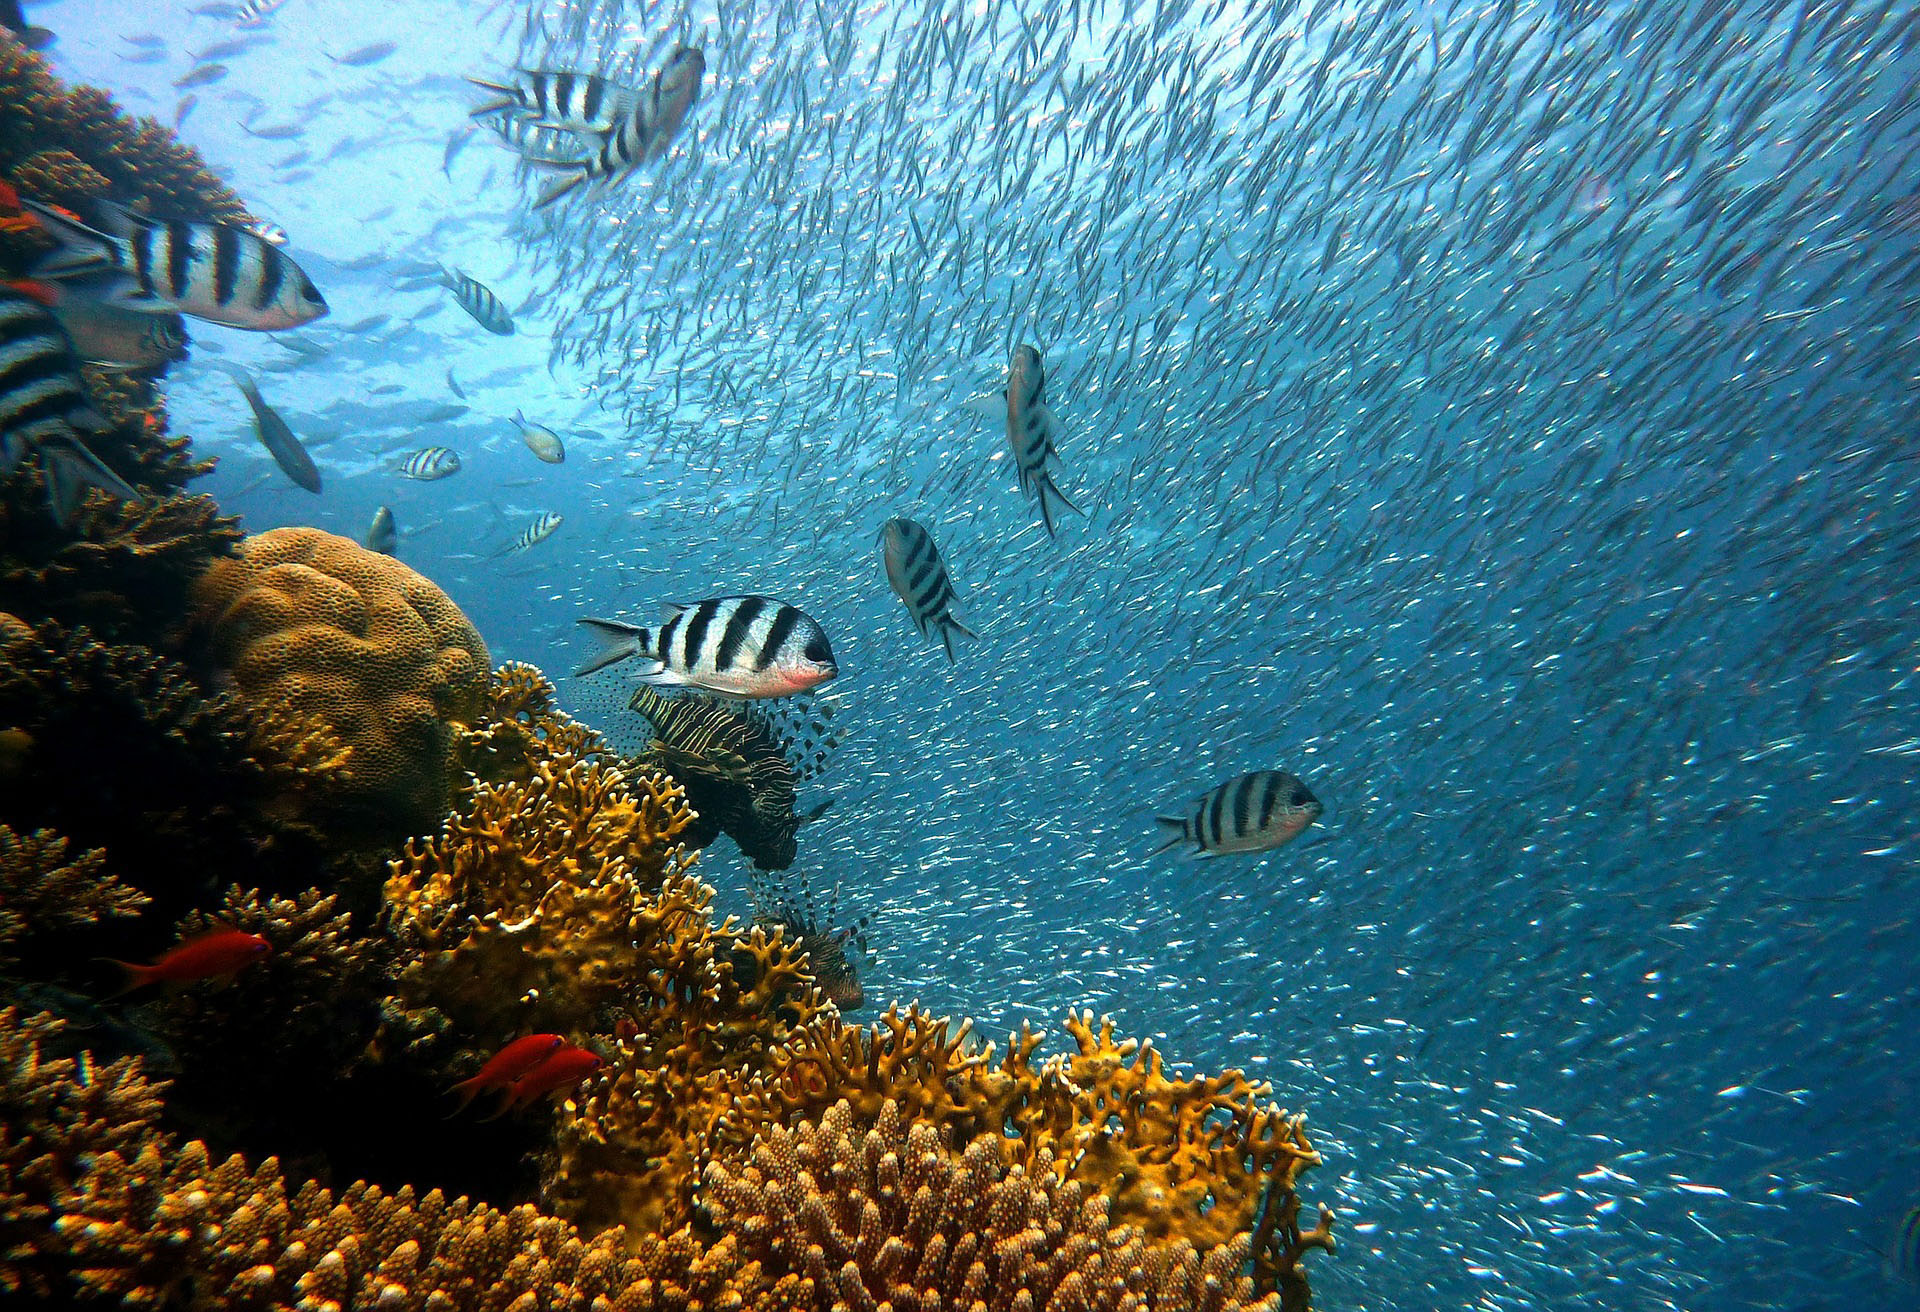
4. For the Snorkeller:
As is pretty obvious, you cannot use a normal Canon/Nikon for underwater shots. Underwater landscape photography can be tricky and it may be cumbersome to try and capture the perfect photo while you are busy trying to make your way inside the water. However, with the right tips and techniques, you can capture some mesmerising photos.
Ideal settings on your camera: Internal Flash – ON in your compact camera. Switch on your strobe light for the photo, using your fibre optic cable for assistance.
Perfect time to capture a shot: During the day (afternoon to be precise), you can find the perfect natural light seeping in through the water to click your photos.
Lens: A basic compact underwater camera. Professionals also use waterproof Canon cameras that have lenses which can adapt to water, but the better option for someone trying it out for the first time is the more basic model.
What to avoid: Avoid gathering specks and blots on your photo, and make use of the backscatter feature to prevent this from happening.
What to focus: Go for a macro shot for underwater photos, to capture the aquatic life. Underwater photos may have an overbearing blue colour in all your photos, as water absorbs colours such as red, orange and yellow, so use a flash to ease the overpowering blue. For objects more than 3 feet away, if you are taking photos with the flash off (also known as using ambient light), you must do 1 of 2 things to improve the colours: use the underwater mode, or do a manual white balance in your camera.
India beckons: The reef life of Andaman and Nicobar Islands make for the perfect places in India to shoot the perfect underwater photo.
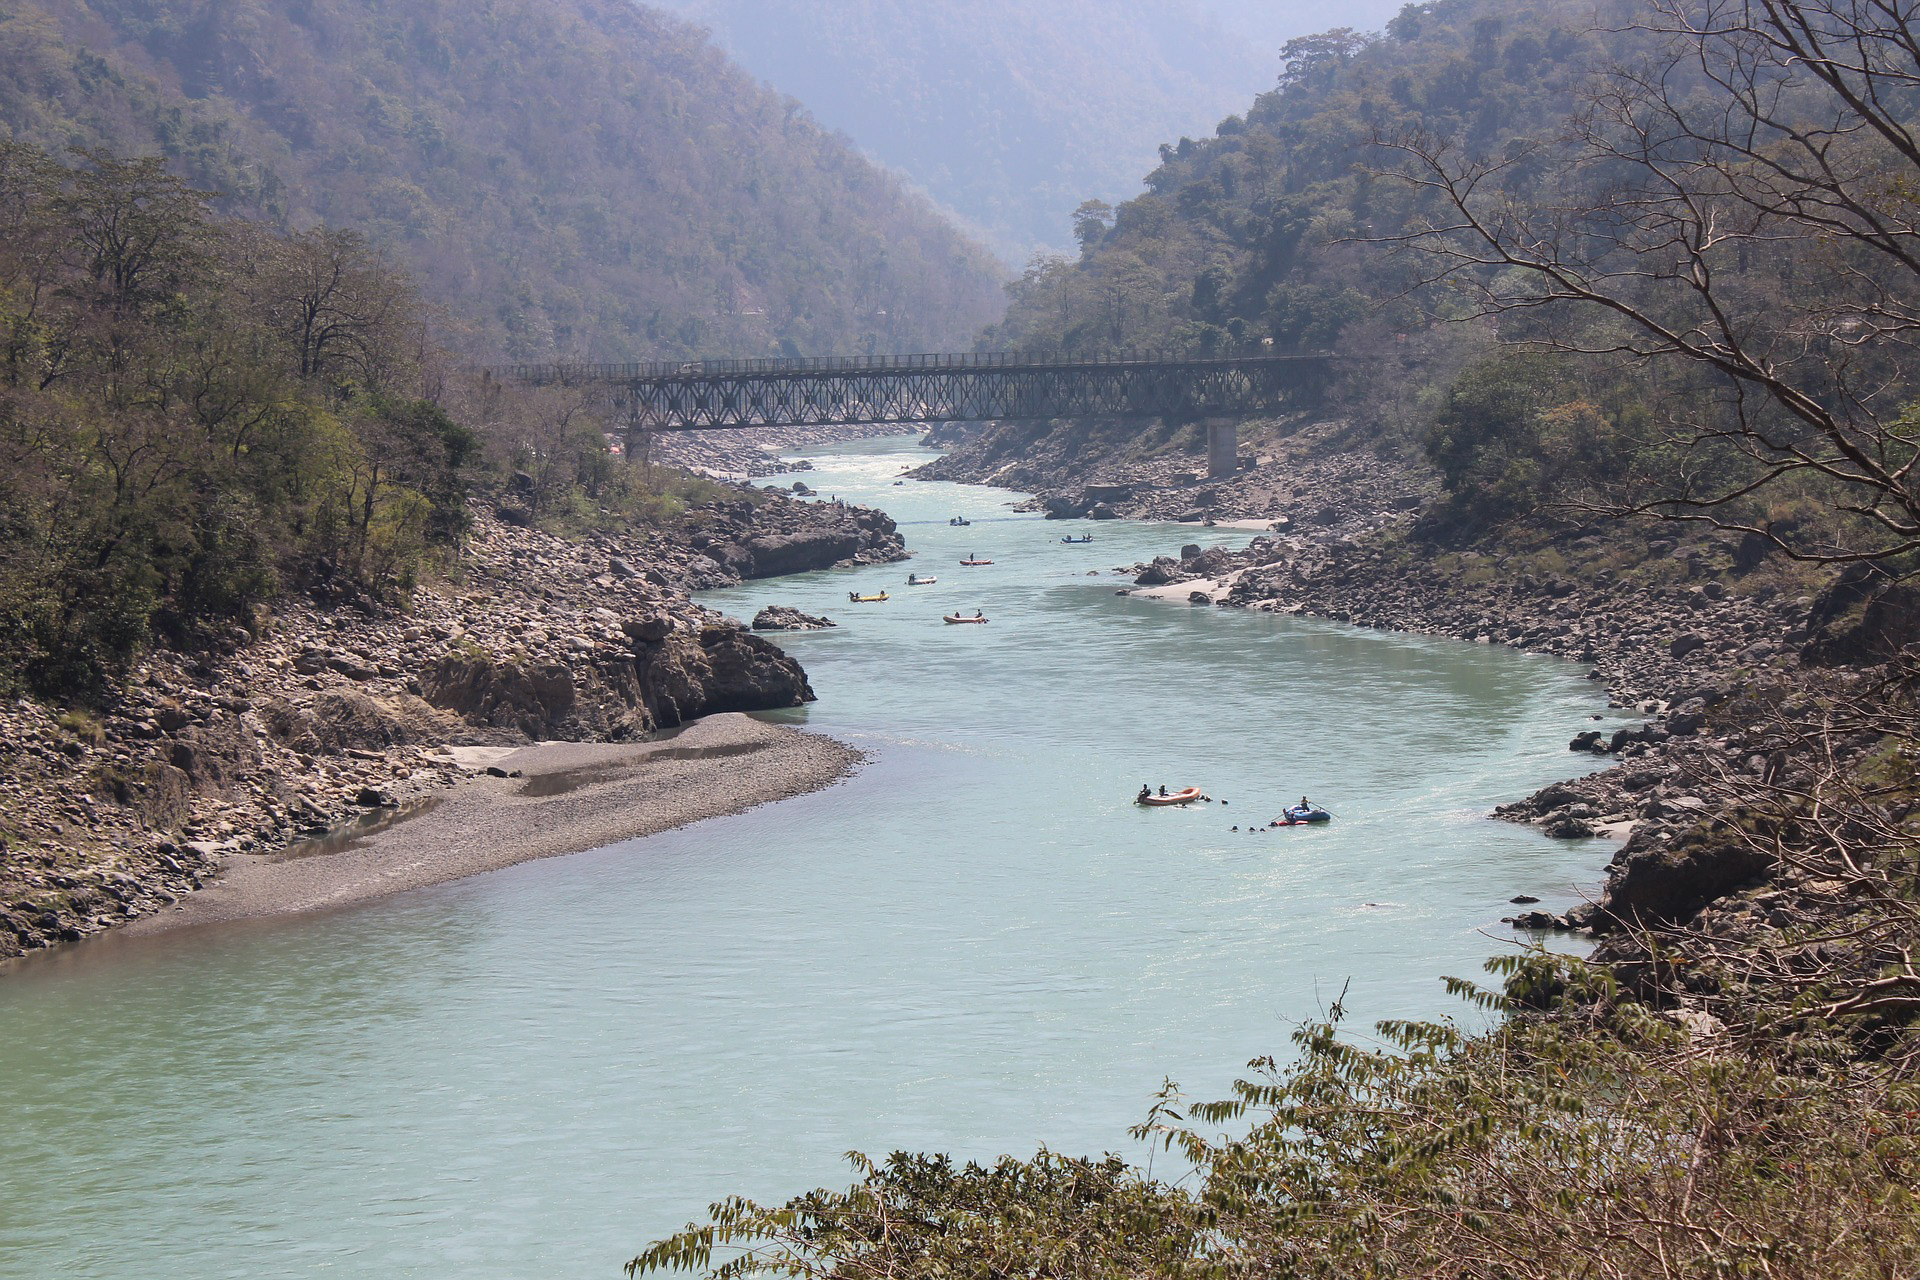
5. For the River Adventurer:
Ever wondered how you get a perfect riverine photo without falling on your backside from the slippery rocks? Simple, wear better shoes. Almost all the time, photographers opt for a place by the river that looks off the beaten path, for a photo they know not too many people will know to click.
Ideal settings on your camera: Use a polarizer for your river or waterfall photo. It removes the glare and brings out the finer details in the picture. Use a tripod and an appropriate shutter speed depending on the type of stream, river or waterfall you are clicking.
Perfect time to capture a shot: During an overcast day. This makes for naturally pleasing photos and you can avoid the post-processing hassle.
Lens: A Samyang 14mm f/2.8 lens with an ultra-wide angle for those perfect dramatic shots.
What to avoid: Remove the clutter from your photos. Tree branches, leaves and other distractions may appear in the photo of a riverine, but if you are careful enough, you can avoid the unnecessary distractions of the foliage.
What to focus: Upstream photos divert the attention of the viewer to the central focus of the photo, the water. Try and shoot upstream to draw the viewer’s eye, like Manish did with this photo.
India beckons: The Lohit River in Arunachal Pradesh and Ganga River in Rishikesh make for excellent riverine photos. The rapids are a good adventure spot too.
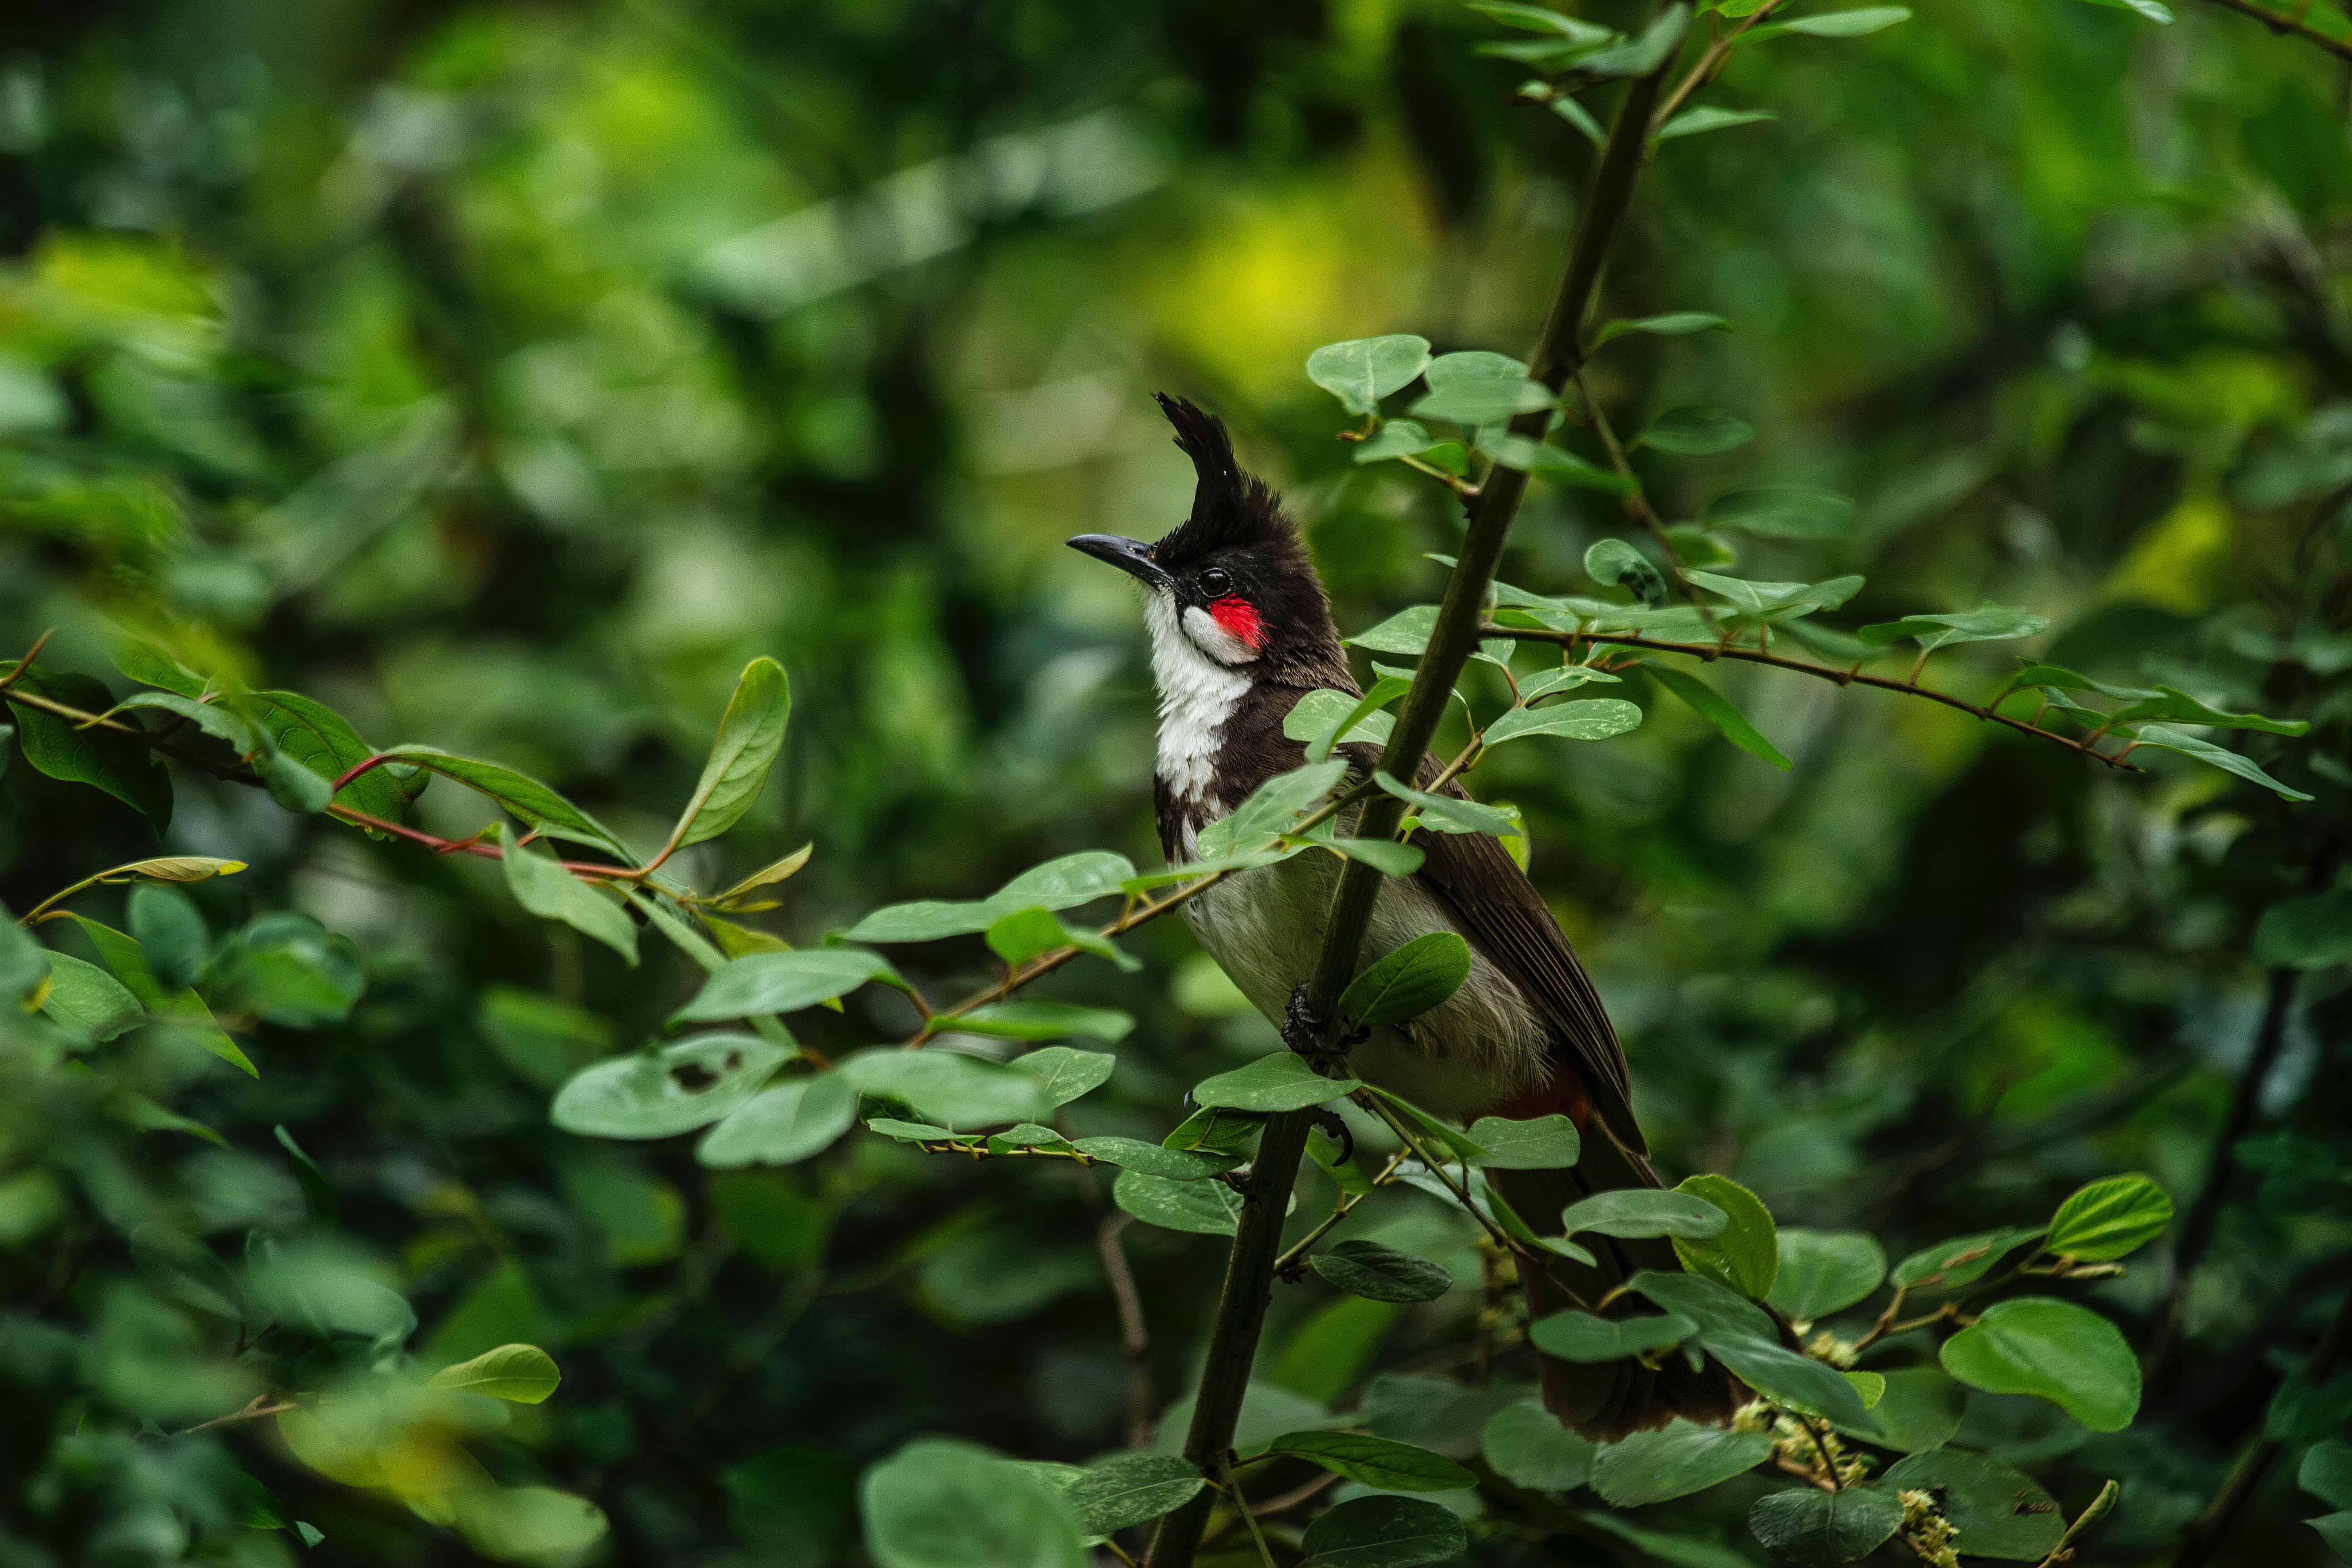
6. For the Forest Explorer:
Forests are nature’s hidden baskets, one that can be difficult to traverse but also make a photographer fall in love with what they see. Therefore, capturing a forest is a difficult task, but one that photographers gleefully take on. After all, it is a magical place to be.
Ideal settings on your camera: Contrast and colour are key in a forest photo so make sure you use a polarizing filter and a low ISO for the perfect photograph.
Perfect time to capture a shot: Mornings. Light filtering through trees make for an amazing shot, so get out after sunrise and wait for the rays to peep through. Chaitanya Deshpande nails this every time, creating whimsical, magical shots of the woodland creatures.
Lens: Telephoto 70-200 lens for deep, dramatic shots of the forest.
What to avoid: Clutter. A forest has a lot of elements that may not appear appealing in a photo, like fog, branches, and leaves strewn hither. Eliminate the clutter and focus on the flora.
What to focus: The amazing, diverse flora and fauna. Take close up shots of the woodland creatures with a narrow depth of field to bring the focus to them. For scenic landscape shots, focus on a lot of pathways in the forest for those vertical photos and linear trees that give your photo a wallpaper appearance.
India beckons: The lush fauna of Periyar Wildlife Sanctuary in Kerala and the golden landscape of the Gir Forests in Gujarat are ideal places in India to test your skills in photographing the forest.
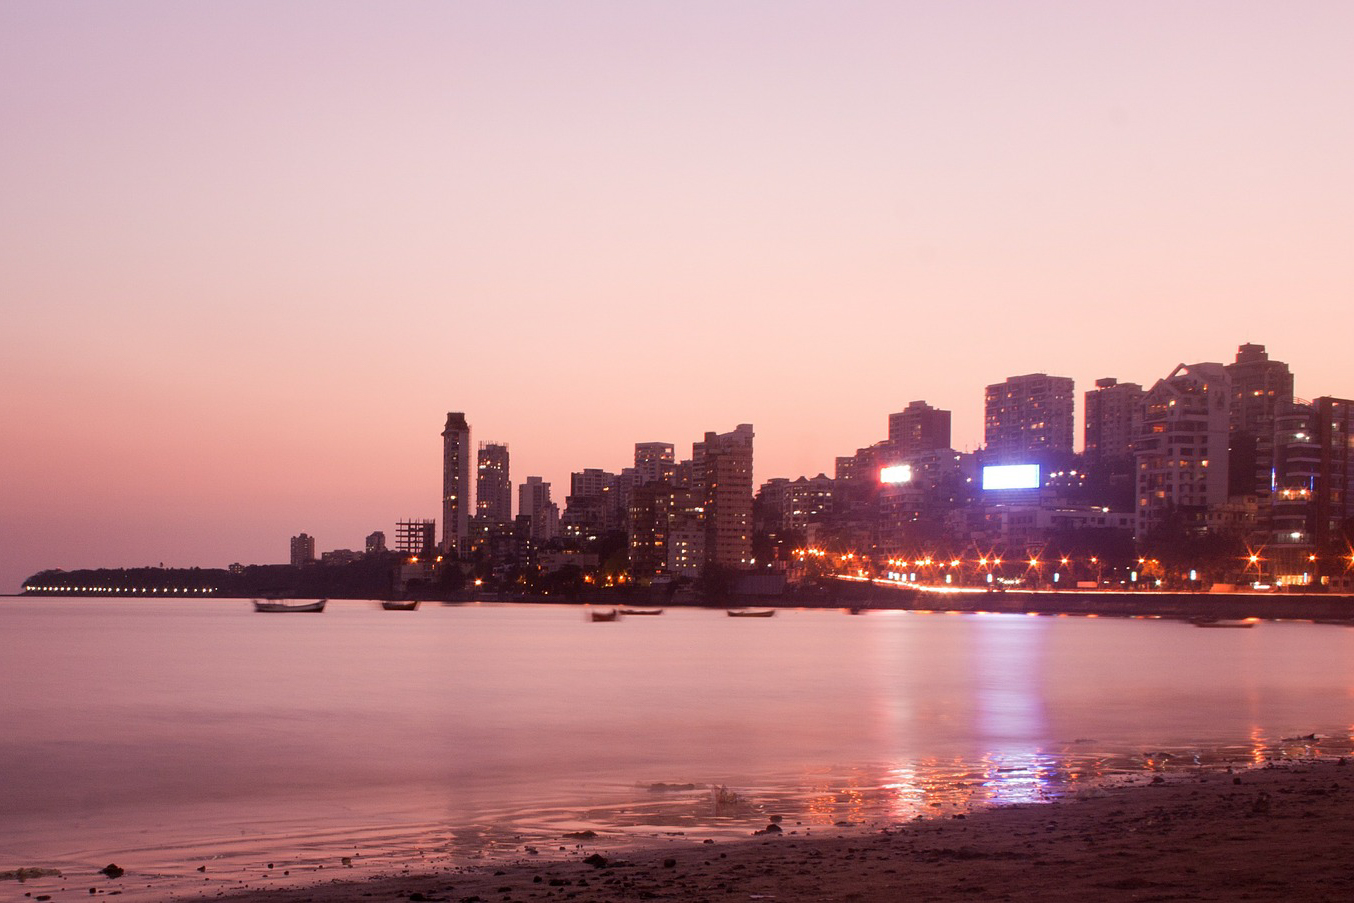
7. For the City Wanderer:
Cities are awe-inspiring for any photographer who loves light, concrete, and crowds. Indian city photography is all about capturing the chaos in a way that makes it look like it is still moving, while being in a picture. Capturing life as it seems so quickly, without clashing with anyone or anything, an order in the pandemonium. Oh, a quick tip, bad weather in a city: perfect for the photographer.
Ideal settings on your camera: Use a self-timer and a tripod. Cities are all about skylines, but stability in a photograph speaks volumes about the nature of the photo that you want to capture as well.
Perfect time to capture a shot: Right after sunset. The sky is dark, city lights illuminate and it becomes a great combination of tones, colours, and life. Apply this tip, and you’ll be able to get a stunning shot, like Rufus Reynolds did with this beautiful shot of Mumbai.
Lens: Wide angle lens to capture the tone of the skyline. Focal lengths between 12-35 mm are a good bet.
What to avoid: Too much colour. While city photography aims to capture the noise and chaos, your photo should not seem so. It should capture a stillness to the life in a city, without there being too many elements to it.
What to focus: Look for good vantage points and leading lines to make your photo seem pleasing.
India beckons: Mumbai and Bangalore are two cities that are ever moving and filled with lights, traffic, and street culture you would not want to miss.
Do you have favourite landscape shots? We’d love to help you print it. Go to Photojaanic‘s website and create photo books that will remind you of your amazing travel!


1 Comment
A detailed guide for different photography styles. I too am learning photography these days and need some input from a professional like you to improve my skills. If you have a few moments to spare here is my Travel Photo Blog. Thank you for sharing this guide